NextJS
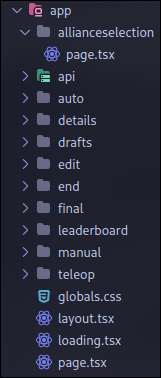
As mentioned, the app directory stores all the pages that will be rendered in the production. The first page.tsx you see will be the website that will be rendered first when you visit the website.
Concept of Pages
In nextjs, or other webapp framework, they use a concept called page. One page is like a word document. In NextJS, to make a page you must create a folder, the folder name will be your page name. In the folder, you will have to create a file called page.tsx, the code inside there will represent a page. Inside the page you need MUST put the following code:
//Preferably your page's name
export default function ANY_NAME_YOU WANT() {
    return
    <>
        {/* here is the `html` part of your code. */}
    </>
}
If you did react before, it looks familiar with react components. This is because it is a react component! You can use react hooks, manage states, and make the page interactive!
How to access your page?
If you created a folder called test and added a page.tsx under the folder. You can access the page with localhost:3000/test.
Routers
Routers are the backend side of your code, they can deal with uploading data to mongodb, fetching data from mongodb. You don't want to publicly expose your api keys to your clients! They work similarly as the concept of pages. Lets take a look at this example:
export async function POST(request: Request) {
    return Response.json("You sent me a POST request!");
}
the word export allows nextjs to read your function, async means a asynchronous operation that doesn't yield code (javascript mainly uses promises). The function name MUST be named as POST, because it is a HTTP POST request. In the function, it MUST return a response.json() or response.error() to indicate a successful return.
How to use your own router?
If you created a folder called test and you have a file called route.ts. Assume you use the following code up there, you want to get a response of "You sent me a POST request!" you can use the following code:
fetch("/test", {
  method: "POST",
}).then(async (value) => {
    //await means pausing the code, because converting the value into a actual readable json format does take time
    const result = await value.json()
    console.log(result) //You sent me a POST request!
})
Advanced POST Requests
Often, you don't just want to send a http request just to get a dumb response of "You sent me a POST request!", what if the client wants to send some data to the server. For example, the client a certain match's data, the client would need to add additional information when sending the POST request. This is when the body comes in handy.
export async function POST(request: Request) {
    const json = await request.json() //similar to the code example up there, you also need to convert this code into json.
    return Response.json(`You sent me a POST request! With additional information of ${json}`);
}
How to send info using POST Request
The concept is similar, but you have to add a body field for fetching. The body will be treated as the request.
fetch("/test", {
  method: "POST",
  body: "hello"
}).then(async (value) => {
    //await means pausing the code, because converting the value into a actual readable json format does take time
    const result = await value.json()
    console.log(result) //You sent me a POST request! With additional information of hello
})